Couture Dog Jacket

Comment

Couture Dog Jacket


No friend should be without this adorable quilted jacket.  It is the best gift to give your best friend.


Supplies Needed (for a medium jacket size):

½ yard fabric for lining and outer jacket , this fabric may be piece or solid fabric

Cotton or wool batting for interior

½” sew in Velcro for closure (measure section A and B for length)

Quilting Frame, Quilting Machine and Robotics

Binding for finishing outer edge 2 ¼”  by the measurement of C, D and E.

Steps:

1.       Quilt fabric yardage and stitch the pattern piece according to your pets size.  You will need to quilt a left and a right side piece.

2.       Remove fabric from frame and cut on the digital pattern line.

3.       With right-sides together stitch the left and a right side pieces.

4.       Cover the seam with a ribbon or binding. 

5.       Bind edges C, D and E of pattern.

6.       Sew on Velcro positioning opposite pieces from each other.

7.       Stitch buttonhole for leash placement.

8.       Take your dog for a walk and see how it fits!

Happy Quilting,


pet jacket.png
Pet Jacket.jpg
SugarJacket.jpg
pets.png

Comment

International Quilt Study Center & Museum

Comment

International Quilt Study Center & Museum

If you are visiting or traveling close to Lincoln, Nebraska may I suggest you do not miss this wonderful stopping spot. International Quilt Study Center & Museum was a highlight of Les and my trip to Lincoln.  We enjoyed our time going to each of the exhibits the museum offered during our visit. Here are a few pictures of our time spent at the International Quilt Study Center & Museum. 


IMG_8197.JPG
IMG_8217.JPG
IMG_8246.JPG

Comment

1 Comment

Project of the Week-Simply Stable Tote for all of your cutting tools!


Materials Needed:  7/8 yd. for each outer & lining fabric 3 yds. of belting for tote strap or make using Simply Stable covered with fabric Batting or Simply Stable for foundation of tote 2-25” zippers Additional is fabric is needed to add pockets. Optional ruler pockets, scissors and other quilting notions.  (NOTE: Amount will vary depending on how many pockets you make)


BEFORE YOU START
 Create your own quilted fabric. Simply sandwich a 7/8 yd. piece of batting between two 7/8 yd. pieces of fabric and sew across the top using your favorite quilting design. Great way to practice your crosshatching.   This tote is designed to hold an 18″ x 24″ rotary cutting mat, 6X24” ruler and cutter. You can increase or decrease the tote size to hold larger or smaller mats, just make sure your tote is 2″ wider and 1″ longer than your mat when folded in order to hold it securely.  When planning pocket placement on the inside of your tote, keep in mind that it will have two top edges because the tote will fold in half when you carry it. Make sure your pocket openings face up when the tote is closed.
STEP-BY-STEP INSTRUCTIONS:
1. Using your rotary cutter, self-healing rotary mat & ruler, cut your quilted fabric to 26x38″  2. Make button loops for sides of the tote by cutting two 6″ pieces of binding and sewing down the long side of each piece to close the binding. 3. Measure 5″ from one short end of the tote and pin a binding piece at that spot. Pin the second loop on the opposite long side, making sure the pieces are aligned. Sew each end in place to make a loop. 4. Pin belting on the outside of the tote, looping it over the top of each side to create an oval shape. Make sure the ovals are centered on the short sides of the tote. These loops will become the handles of your tote. 5. Securely stitch belting to the quilted fabric. 6. With right sides together stitch zipper around the three outer edges of the tote.  using instructions with zipper package. Two zippers will join at top of tote for opening.  
Make the pockets:
1. Lay out the OLFA rulers you want to carry on the inside of your tote. This will help you determine where to place the pockets. 2. To cut fabric pieces for pockets, use the following formula: (ruler width x 2 + 1″) + (ruler length + 2.5″). Example: If your ruler is 6″ x 12″, you will cut a 13″ x 14.5″ piece of fabric. 3. Fold each fabric piece in half, right sides together, and sew the long edge and one short edge, using a 1/4″ seam allowance. Leave the remaining short edge open. 4. Turn the pocket right side out and press flat. 5. Hem or bind the top open edge to finish the pocket. 6. Make as many pockets as you need.  

Happy Quilting,

Denise

1 Comment

1 Comment

Color Theory

Understanding color is not something that always come naturally to everyone, but it is something that can be taught.  This week during a local club I teach we discussed color theory.  We had a very good discussion and because of our talk I though it would be good to post some of our lesson.


Color Wheel with triangle, square and rectangle.

Color Wheel with triangle, square and rectangle.

If you are a quilt and looking to learn more about color theory think about these options:

1. A quilt with two colors, on the color wheel you could us complimentary colors that are opposite on the color wheel. Yellow and violet or red and green would be examples of complimentary colors.

2. If you are going to make a quilt with three colors, look at using the Triadic colors that form the triangle. Blue, yellow and red would be examples of the triangle/Triadic color way.


You can use any color variation with regards to values, light or dark. This color wheel shows the variation of each color on the wheel.

You can use any color variation with regards to values, light or dark. This color wheel shows the variation of each color on the wheel.

Keep in mind if you us two colors it could be multiple fabrics in the same color.  This will give a bigger value in your quilt.

Here are six ways for you to try playing with color.  This about an exercise of making 6 blocks with the different color ways seen above.

Here are six ways for you to try playing with color.  This about an exercise of making 6 blocks with the different color ways seen above.

1 Comment

Comment

True or False

When it comes to stitching embroidery designs, stabilizers, hooping and other steps with creating a great embroidery design comes many questions about true and false.

Lets talk about some of the myths, misnomers, truths. 

 1. Hoop- have you been told to hoop your fabric and stabilizer as tight as possible?

  • It is not a military bed or a drum.  The same thing happens when we load a quilting frame and put it as tight as possible, the fabric puckers when you remove it from the hoop or frame.
  • The only time you want the fabric as tight as possible is when you hoop something that is going to be worn tight.  I am sure you are all going to go out and embroidery your swimsuit.  Lycra and other body forming fabrics you want to hoop tight.
  • Puckering happens due to the fabric having lift and returning to its original form/life.  Polyester thread will magnify the puckering.  You will also see this with your sewing machine tension being too tight. 
  • Caution, don't stretch your fabrics.

2. A good design will sew out beautiful and perfect every time.

  • These items do not make a difference:
    • Fabric
    • Machine
    • Texture
    • Thread Color
  •  Embroidery is a form of art. Is art ever perfect?  Only to the artist that made it. Reality is that the hoop is always moving.  Fabric is being pushed and pulled. Our sewing machine needles wear down and change the stitching. Bobbins that are wound to fast are overly tight causing gaps in our alignment of the design. Wrong fabrics with the stabilizer and threads can be a disaster.
  • So at the end of the day proper digitizing is only one part of the equation when looking to get a good stitch out.

Watch for more information on how to get good stitching with our embroidery machines.

Happy Sewing,

Denise

IMG_5458.JPG

Comment

Comment

Converting Designs Using Art & Stitch

Saving Your Design

To save the design

1. Open the File menu and scroll down to Save As

2. Formats for those who want to sell the designs they create

3. The Save As box opens a) In the Save in: window select the folder where the design is to be stored b) In the File name: window give the design a name c) Save the .ans editing file. (1) The .ans file should always be saved first. (2) This file can be re-edited at a later date in the same ways you edited on the day you created the design.

4. You will also need to save the .hqf file that the Pro-Stitcher reads a) Open the File menu and scroll down to Save As b) In the Save in: window select your flash drive c) The name you selected will already be in the File name: window so no change is required there

5. Open the Save as type: window 

a) You can save in a variety of quilting formats

b) Or you can save in any one of the many embroidery
Pro-Stitcher – Art and Stitch Basics  

c) You can also batch save to multi formats at the same time by using the SAVE TO All Quilting or All Embroidery Formats.
                                                                                      
6
formats c) There is also an option to save in All Embroidery Formats or All Quilting d) Select HQ Pro-Stitcher (HQF) and Save B. The flash drive can then be inserted in the Pro-Stitcher

1. Go to the Library

2. Click on File/Design and Load Pattern

3. Navigate to the USB Stick (Usually your D drive)

4. Select your design and quilt

Comment

Thread Know How

Comment

Thread Know How

Threads can make or break your embroidery project.  Read through this information sheet and use it as a reference to know where embroidery threads can and should be used and needles etc. to use with them.

Threads are listed by type, fiber, and weight. Specific thread types for embroidery are recommended for both the top and the bobbin.
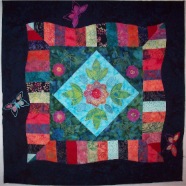
Embroidery Threads
Embroidery thread is used on top only for most embroideries.  Bobbin thread should always be used in the bobbin unless the embroidery needs to be reversible such as on a quilt, towels, lace designs or other projects where both sides of the embroidery will be seen.40 wt. rayon embroidery thread is the most popular thread used for embroidery.  The sheen gives a nice look to the embroidery and the 40 wt. is the standard for which most embroidery designs are digitized.  Use a size 80 Universal or Embroidery Needle when embroidering with 40 wt. rayon threads.  Sulky and Robison Anton are two of the companies that produce 40 wt. rayon threads.

35 wt. rayon threads are available for use with redwork type designs.  It is a slightly heavier thread that can be a solid color or a twist of several colors twisted together.  Robison Anton’s Twister Tweed is an example of a two color twisted 35 wt. thread. Sulky has Ultra Twist 35 wt. thread in many colors as well.

40 wt. polyester embroidery thread is preferred by some people for use on children’s wear, towels, swimwear and other items that are washed often and may be subjected to bleach.  It is a more colorfast thread, and can have a high sheen to it.  It is a stiffer thread.  Think of a polyester wrinkle free garment.  It is made to resist wrinkles.  The polyester thread works the same way and isn’t as soft as a rayon.  The result is that tension adjustments may be necessary when stitching with polyester threads.  Use a size 80 Universal or Embroidery Needle when embroidering with 40 wt. polyester threads. Sulky and Robison Anton are two of the companies that produce 40 wt. polyester threads.

40 or 50 wt cotton embroidery thread is sometimes preferred for embroidery designs with a less shiny, a matte look.  As long as it is a good quality embroidery weight cotton thread, it will embroider nicely without any adjustment needed.  Many people prefer to embroider with cotton top and bobbin when quilting a quilt with an embroidery design.  Use a size 80 or 90 Universal or Embroidery Needle when embroidering with 40 or 50 wt. cotton threads.  Robison Anton and Mettler produce 40 and 50 wt. cotton threads for embroidery.

25 and 30 wt. cottons are heavier weight threads. This weight is preferred for designs like redwork which is embroider with an outline straight stitch.  The heavier weight thread gives a nice look to the embroidery.  Use a size 90 topstitch needle when embroidering with a 25 wt. or 30 wt. cotton thread.  Robison Anton offers many colors of 25 wt. cotton quilting threads suitable for specialty embroidery designs.  Sulky’s 30 wt. cotton thread is also available in Blendable colors which are multi colored thread with irregular color changes for beautiful quilting and color shading.

12 wt. cotton is a very heavy thread.  It is used in redwork and other straight stitch designs or designs digitized for heavier threads.  For successful embroideries, use a spring foot and be sure to use a size 90 or 100 Topstitch needle.  Sulky’s 12 wt. cotton comes in solid colors and Blendable colors.

Specialty threads like metallic and glitter threads are nice to highlight certain sections of a design.  Use a size 90 or 100 topstitch needle.  Most metallic threads stitch best in a vertical position.  Slow down the speed of your machine if possible.

Bobbin Thread
Bobbin thread comes on spools for you to wind your own bobbin or on pre-wound bobbins. Embroidery bobbin thread is very light weight and can be nylon, polyester or cotton. Always use bobbin thread when embroidering unless you need the embroidery to be reversible.  In that case, wind a bobbin to match the top thread.  Because bobbin threads are lighter weight than regular embroidery thread, you may need to enlarge the design to make it less dense, and/or adjust the tension when using a matching thread on the bobbin.

Sewing Thread
Sewing thread for garment construction, quilting etc. is usually a 50 wt. thread.  It may be all cotton, cotton covered polyester or 100% polyester.  Always buy a good quality sewing thread.  There are many brands available.  A good quality thread is smooth, made from long fibers twisted together and doesn’t have knots or other irregularities in it. Sewing thread is not recommended for embroidery designs.

Specialty Threads
Thick, heavy specialty threads like button and carpet thread, upholstery thread and hand quilting thread are all treated for hand use and do not work well for machine stitching.  It is not recommended that they be used at all on your sewing machine.


Moon Garden embroidered quilt
Assorted threads by YLI

Comment

Comment

Backing and Bedsheets

Using bed sheets to back your quilts? Don’t Do It!

Sheets have a high thread count which forces the needle in your machine to break the thread in the sheet as it pierces through. This leaves holes in your backing and diminishes the stability of your sheet that you are using for the backing. Keep sheets on the bed not on the quilt.

Quilting fabric has a looser weave, which allows your needles to easily slide between the threads and keeps your quilt backing intact.

Changing the needle does not prevent this from happening. You will also find that the sheetmay pucker once it is removed from the frame.

Happy Quilting,

Denise

Comment

Ladies Only Retreat

Comment

Ladies Only Retreat

What: Stitch Don’t Bitch Retreat!

Join Denise Schober (that's me) , June 22 through June 25th our next Embroidery Retreat in beautiful Frankenmuth. You will be creating a fun whimsical in the hoop project and learn as you go.  At this retreat you will be learn with daily demos on many quilting techniques. Along with plenty of time to do your own project.  Price includes: Room with 2 person occupancy for only $400.00 per person.  $50 deposit required to reserve your spot.  Just a few spaces left. Ladies only, no men or children. 

Checks are written to: Applegate Materials & Systems, Inc. PO Box 629, Hartland, MI 48353

2 lessons daily includes all kit supplies if needed. Many small demos for embroidery and software.

1 rectangle 6 foot table per person and a nice chair with Fabulous Gifts & Prizes!

Where: Drury Inn & Suites Frankenmuth, 260 South Main, Frankenmuth, MI 48734

Meet and Greet Dinner Thursday.  Breakfast and dinner are included.

Base supply list:  (Your own projects to work on and any supplies you need for the project.)

Machine, Embroidery Unit, hoops and foot

Embroidery Thread lots of colors

Bobbin Thread

Embroidery Needles 80/12 and 90/14

Stabilizers

Provided: Any class projects all supplies will be supplied except basic embroidery threads.  Irons and ironing boards, cutting mats and cutters. 6 foot table for each student. Snack table (please bring a snack to share), cooler with ice for drinks (please bring any drinks you may want BYOB), and lots of learning for four days!

Ladies, hope you can join us!

Comment

Wildflower Quilt

2 Comments

Wildflower Quilt

It has been fun to make the Smith Street Wild Flower and More Wild Flower Quilt. When I brought it home Les loved it so much he would like it as a bed quilt for the master bedroom.  Most all of the fabrics came from my stash.  I only added a couple of new pieces.

Here is what I have come up with so far. I just need to embroider a few more blocks and then its time to quilt.

How would you quilt this and what color thread do you suggest?

Barb and I had fun making this quilt together.  Can't wait to put it on the frame.

Barb and I had fun making this quilt together.  Can't wait to put it on the frame.


2 Comments

1 Comment

The Right Thread for the Right Job!

Ask yourself what you want to see-

Quilting, Stitching or the Piecing

•12 wt. Thread

Heaviest for machine quilting

Larger needle 110-120 (on long arm machine)

90/14 needle on home sewing machine

Stays on top of quilt

•30 & 40 wt. –long staple important for quilting

Most used thread weight for quilting on top

Needle size 100-110,

90/14 needle on home sewing machine

Stays on top of quilt

•50 & 60 wt. bobbin weight

Common size for bobbin weight thread

Lays in the fabric more that heavier weight threads

If you have a thread that does not like to go in a needle use it for bobbin

•Mark spool only for bobbin

•Why does thread break??

8/12 needle on home sewing machine

Stays on top of quilt

•100-50 wt. goes into the fabric

Piecing with 50 wt.

Micro quilting with light weight

90/14 long arm needle

75/11 or 80/12 needle on home sewing machine

Stays on top of quilt

1 Comment